
My good friend Kat (of Kat Spencer Photography) mentioned that she was going to be setting up a photobooth at the Special Arts Festival in Garland this month. She told me about the awesome kissing booth that she was building, and said she was making mustaches and other fun props for the kids to enjoy. "Would you want to help?" she says. "Are you kidding?? You had me at 'mustaches'!" I said.
Well, actually, she had me at 'photobooth'. I won't deny that I am obsessed lately.
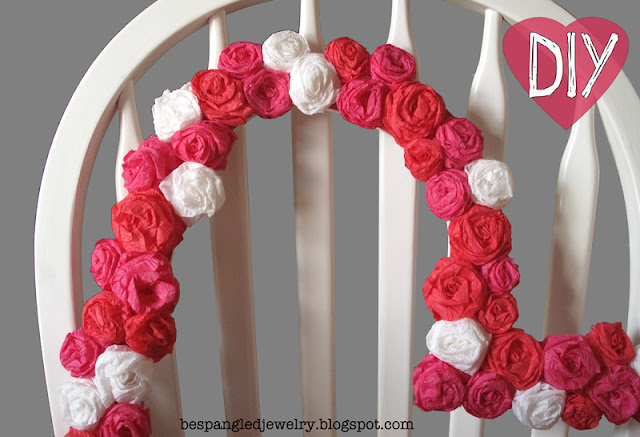
Anyway, I thought it would be cute to make some heart-shaped frames as props, and I wanted to practice my crepe paper flower rolling technique...hence this project was born!
TOOLS & SUPPLIES:
• foam posterboard or other type of frame
• crepe streamers, 2 or 3 rolls (or as many different colors as you want)
• scissors
• hot glue gun
• tons of glue sticks (seriously, like a lot)
DIRECTIONS:
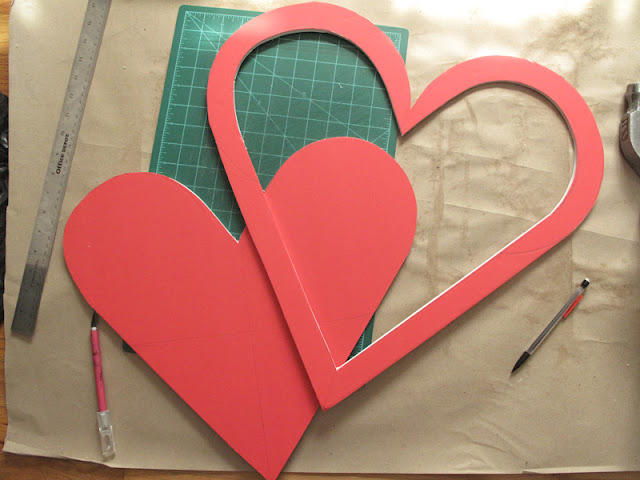
I made my own frame out of foam-backed posterboard. (It can be any color). I cut out my heart shape using a craft knife, then sketched a line around the shape about 1.5" inside the edge, and cut that out as well. (Click here if you'd like to see how to draw a perfectly symmetrical heart without a template!)
 I chose 3 colors of streamers from what I found at the dollar store: white, hot pink, and red. I would have also got a medium pink if they had any, but I am really happy with the way my color combo came out!
I am planning to make some decorations for my wedding using this technique, and I'm just drooling over all the awesome color choices I'm finding on Amazon!!! (Don't laugh - I'm thinking of picking my colors based on the streamer colors I fall in love with the most...seafoam, orange, peach?)
Anyhoo. While this project is time consuming - it took me an entire day to make each frame - it's really pretty easy and a lot of fun!
To make the roses, start by cutting or tearing off a length of streamer about 24" inches long. I didn't measure, because I knew I wanted all my flowers to be different sizes. I used shorter strips for the smaller flowers.
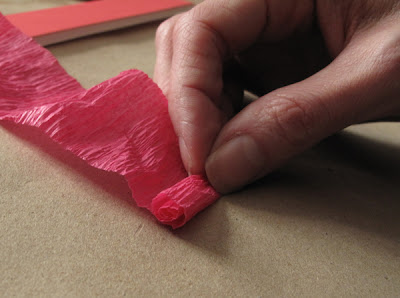
Start rolling up one end of the streamer loosely, going around about 4 or 5 times.
It's a good idea to dab a dot of hot glue on the inside of the roll every few turns, to hold the flower together. Otherwise, the center can fall out and unravel the whole darn thing!
Keep twisting and wrapping around the flower, keeping the twists loose for a nice life-like rose!
 I chose 3 colors of streamers from what I found at the dollar store: white, hot pink, and red. I would have also got a medium pink if they had any, but I am really happy with the way my color combo came out!
I am planning to make some decorations for my wedding using this technique, and I'm just drooling over all the awesome color choices I'm finding on Amazon!!! (Don't laugh - I'm thinking of picking my colors based on the streamer colors I fall in love with the most...seafoam, orange, peach?)
Anyhoo. While this project is time consuming - it took me an entire day to make each frame - it's really pretty easy and a lot of fun!
To make the roses, start by cutting or tearing off a length of streamer about 24" inches long. I didn't measure, because I knew I wanted all my flowers to be different sizes. I used shorter strips for the smaller flowers.
Start rolling up one end of the streamer loosely, going around about 4 or 5 times.
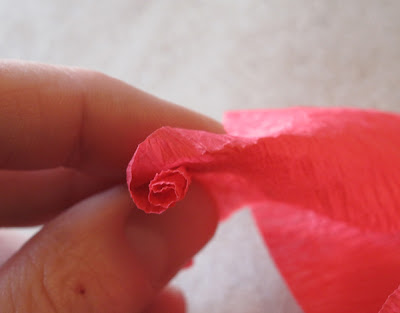
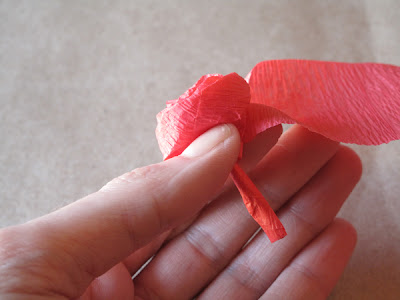
Then, fold back and loosely wrap the streamer around the center. You are sort of half twisting the paper, and with each twist and wrap, you form a new petal.
It's a good idea to dab a dot of hot glue on the inside of the roll every few turns, to hold the flower together. Otherwise, the center can fall out and unravel the whole darn thing!
Keep twisting and wrapping around the flower, keeping the twists loose for a nice life-like rose!
You should be wrapping all the petals around the top part of the roll you first made. It's kind of hard to explain, but I just mean to keep wrapping around the outside of the flower instead of moving down with each wrap. If you're doing it right you should have a 'stem' like this:
NOT like this:
When you reach the end of the streamer, glue it down to the outside of your flower with a tiny dab of hot glue. Trim off the 'stem' with scissors. When you're ready to add flowers to your frame, apply a spiral of hot glue to the bottom of the flowers, and place them on the frame one at a time.
I staggered my roses like this because I wanted to hide both inner and outer edges of the frame from the front. I came back and filled in the gaps with different size flowers, and sometimes even put the glue on the sides of the rose and glued it to the other flowers if there wasn't enough room to glue the bottom to the frame. It worked just fine!
I'll be posting another tutorial soon to show you how I made some other fun props...like mustaches!!!!





Looks very lovely! I really like the colors of those rosettes! Thanks for sharing!
ReplyDeleteYour are so super awesome! Thanks for making such amazing props. They were a big hit at the Special Arts Festival and at the Kindergarten Valentine's Day party photo booth.
ReplyDeleteIs that ever gorgeous! Thanks for sharing this at my Pin Me Linky Party. I am following via FB, Pin, & Twitter!
ReplyDeleteThis is wonderful! Love it!
ReplyDelete